Quick answer
Store summer hats for fall only after they are clean and completely dry. Keep structured hats supported rather than stacked, protect delicate materials from direct sunlight and dampness, and choose a setup that lets each hat keep its shape. A wall-mounted organizer can work well in a closet or entryway when the wall and installation method suit the load.
Key takeaways
- Clean and air-dry every hat before putting it away.
- Use individual hooks or shelf dividers for structured caps and brimmed hats.
- Store hats away from direct sunlight, heat, and damp areas.
- Check the wall surface and mounting method before installing a rack.
- Review stored hats when the season changes instead of waiting for damage to appear.
Why summer hats need a seasonal storage plan
Hats often get treated like accessories that can be tossed into a bin, but their shape makes them easy to damage. A cap can develop a permanent crease when buried under clothing, while a straw brim may warp if it is bent repeatedly. Sweat, sunscreen, dust, and moisture can also linger in the fabric or inner band long after a hat looks clean.
A seasonal reset is useful because it creates a natural pause. Instead of moving every hat into the back of a closet, you can decide which pieces belong in everyday rotation, which need cleaning, and which should be stored until warmer weather returns. The goal is not an elaborate closet system. It is simply to give each hat enough support, airflow, and visibility to remain wearable.
Clean and dry hats before putting them away
Start by checking the care instructions supplied with each hat. Care labels and manufacturer guidance take priority over a general cleaning routine, especially for wool, leather, suede, embellished materials, or hats with glued components. The Federal Trade Commission explains that care instructions are intended to help consumers clean textile products without causing damage, so do not assume every hat should be machine-washed.
For a basic fabric cap, remove loose dust with a soft brush or gently shake it outdoors. Spot-clean visible marks with a small amount of mild detergent and a barely damp cloth if the material allows it. Avoid soaking structured hats unless the maker specifically permits it. Reshape the crown and brim while the hat is damp, then leave it in a well-ventilated place until fully dry.
Do not store a hat simply because the outside feels dry. Check the sweatband, seams, and inside of the crown. Any remaining dampness can create an unpleasant odor and may encourage material deterioration in a closed container. Keep hats away from radiators, hair dryers, and intense direct heat, which can distort materials or finishes.
Match the storage method to the hat type
The best storage method depends on whether the hat needs support, protection, or easy access. A soft cotton cap is more forgiving than a structured felt hat, while a wide brim needs room around it. Use this quick guide before choosing a shelf, box, hook, or wall rack.
| Hat type | Practical storage choice | What to avoid |
|---|---|---|
| Soft baseball caps | Individual hooks, a shallow basket, or a cap organizer | Heavy piles that flatten the crowns |
| Structured caps | Hooks or shelf space that supports the crown | Folding the brim or packing them tightly |
| Straw and wide-brim hats | A cool shelf or roomy box with light support | Pressure from other items and damp storage |
| Wool or felt hats | A breathable shelf or correctly sized hat box | Plastic bags that trap moisture |
For hats that will sit untouched for months, a clean, breathable cover can help reduce dust. Do not use a container so tight that it presses against the brim. If you stack soft hats, place the least structured pieces at the bottom and keep the stack low enough that its weight does not deform the lower crowns.
A five-step fall hat-storage checklist
- Sort. Separate hats you will still wear this season from those going into storage. Remove damaged or uncomfortable pieces from the active area.
- Inspect. Look for makeup marks, sweat residue, loose stitching, bent brims, and missing fasteners.
- Clean. Follow the care instructions and use gentle spot cleaning where appropriate.
- Dry and reshape. Allow each hat to dry fully while restoring its original crown and brim.
- Assign a home. Place frequently used hats where they are visible and seasonal hats in a protected, less crowded location.
This sequence prevents a common problem: storing a hat with a small issue and discovering it months later when you need it immediately. It also makes next spring’s wardrobe change faster because the collection is already separated and inspected.
When a wall-mounted hat organizer makes sense
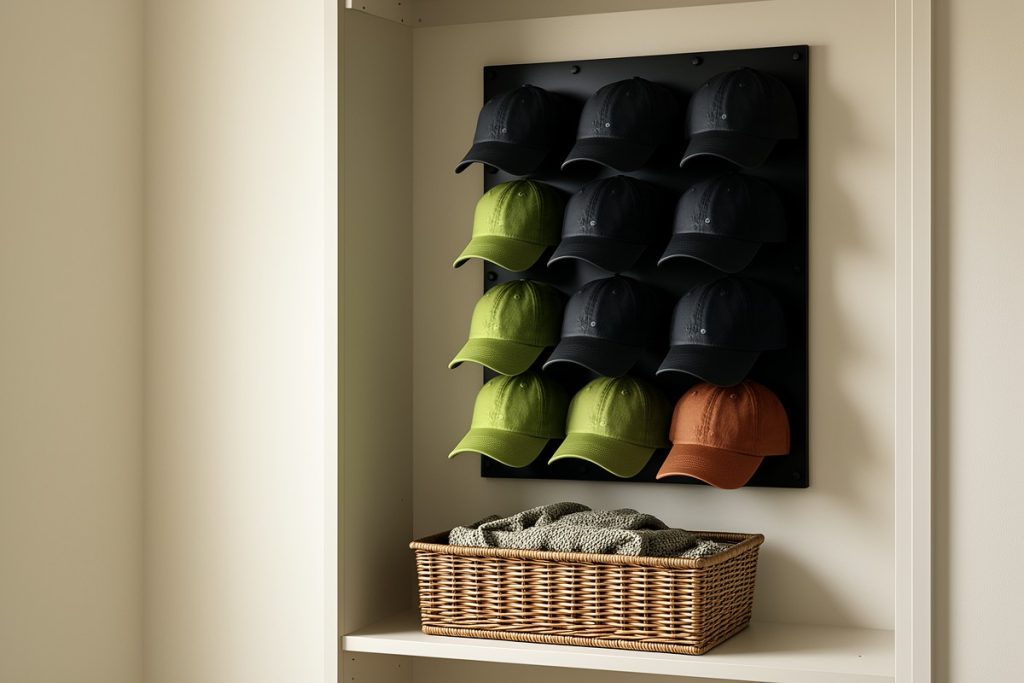
Wall storage is useful when hats are taking over a shelf, entry bench, or closet floor. It keeps individual pieces visible, which can reduce the temptation to pull everything down while searching for one cap. It can also turn an unused section of a closet or bedroom wall into a dedicated seasonal-accessory zone.
One option is the Durmmur Stainless Steel Hat Organizer, Hat Rack for Wall, Each Holds 15 Hats. The product listing describes a black metal holder with adhesive and wall-drilled installation options and a capacity of up to 15 hats. That makes it worth considering for someone who wants visible, separated storage, but the right choice depends on the wall surface, the combined weight of the hats, and whether a permanent installation is acceptable.
Before buying or mounting any organizer, measure the available wall space and count the hats you realistically plan to keep there. A rack that is technically large enough may still feel crowded if the hats have wide brims or need room to be removed easily. Also check whether adhesive is suitable for the surface. Painted drywall, wallpaper, textured walls, tile, and wood can behave differently, so follow the installation instructions rather than assuming every mounting method is interchangeable.
How to protect hats on hooks and shelves
Hooks should support a hat without forcing the crown into an awkward shape. For baseball caps, a rounded hook or a hook placed through the rear adjustment opening can work, provided it does not stretch or tear the band. Avoid hanging a delicate hat from a narrow point that creates a visible pressure mark.
Keep the storage area cool, dry, and away from a sunny window. The Library of Congress recommends controlling light, temperature, and humidity when caring for collection materials; the same basic preservation principles are sensible for personal accessories. In practical terms, that means avoiding a damp bathroom, a hot attic, or a bright windowsill for long-term storage.
Leave a little space between hats so air can circulate and so you can spot dust or misshaping early. If you use a closet door, check that the hats will not be crushed when the door closes. For a bedroom or entryway, keep the arrangement high enough to avoid casual bumps but low enough that removing a hat does not require pulling down neighboring pieces.
Make the seasonal swap easier next time
At the end of the storage cycle, take one quick photograph of the arrangement for your own reference, then return hats to the same zones each year. You can group them by use, material, or frequency rather than by strict fashion category. For example, everyday caps can stay near the entryway, while sun hats and special-occasion pieces can move to a protected shelf.
Do not keep a hat solely because it belonged to a previous season. If it no longer fits, has a persistent odor, or requires more repair than you are likely to complete, move it out of the active collection. A smaller, visible rotation is easier to maintain than an overflowing pile, and it gives the hats you actually wear enough space to stay in good condition.
Last reviewed: 2026-08-31